

A well-aligned frame is level, plumb and square, with fixings approximately 150 mm from each corner and spaced 600 mm apart; these are key details in uPVC window installation.
The frame’s position matters as much as the window itself. This guide explains how to prepare the opening, position and support the frame, and check that the sash, seals and hardware work as intended.
Key Takeaways
- Measure the opening in more than one place and allow clearance around the frame so it can be positioned accurately.
- Support the cill fully, keep the sides plumb and check that the frame’s diagonals are equal before securing it.
- Use packers at fixing points to support the frame and help prevent the screws from distorting it.
- Test the sashes after packing; if one catches, the position of the glass packers may need adjusting.
Frame fixing, levelling and alignment
During uPVC window installation, secure the frame only when it is level, plumb and square. Correctly positioned fixings and packers support the frame without twisting the uPVC.
-
Drill the fixing holes
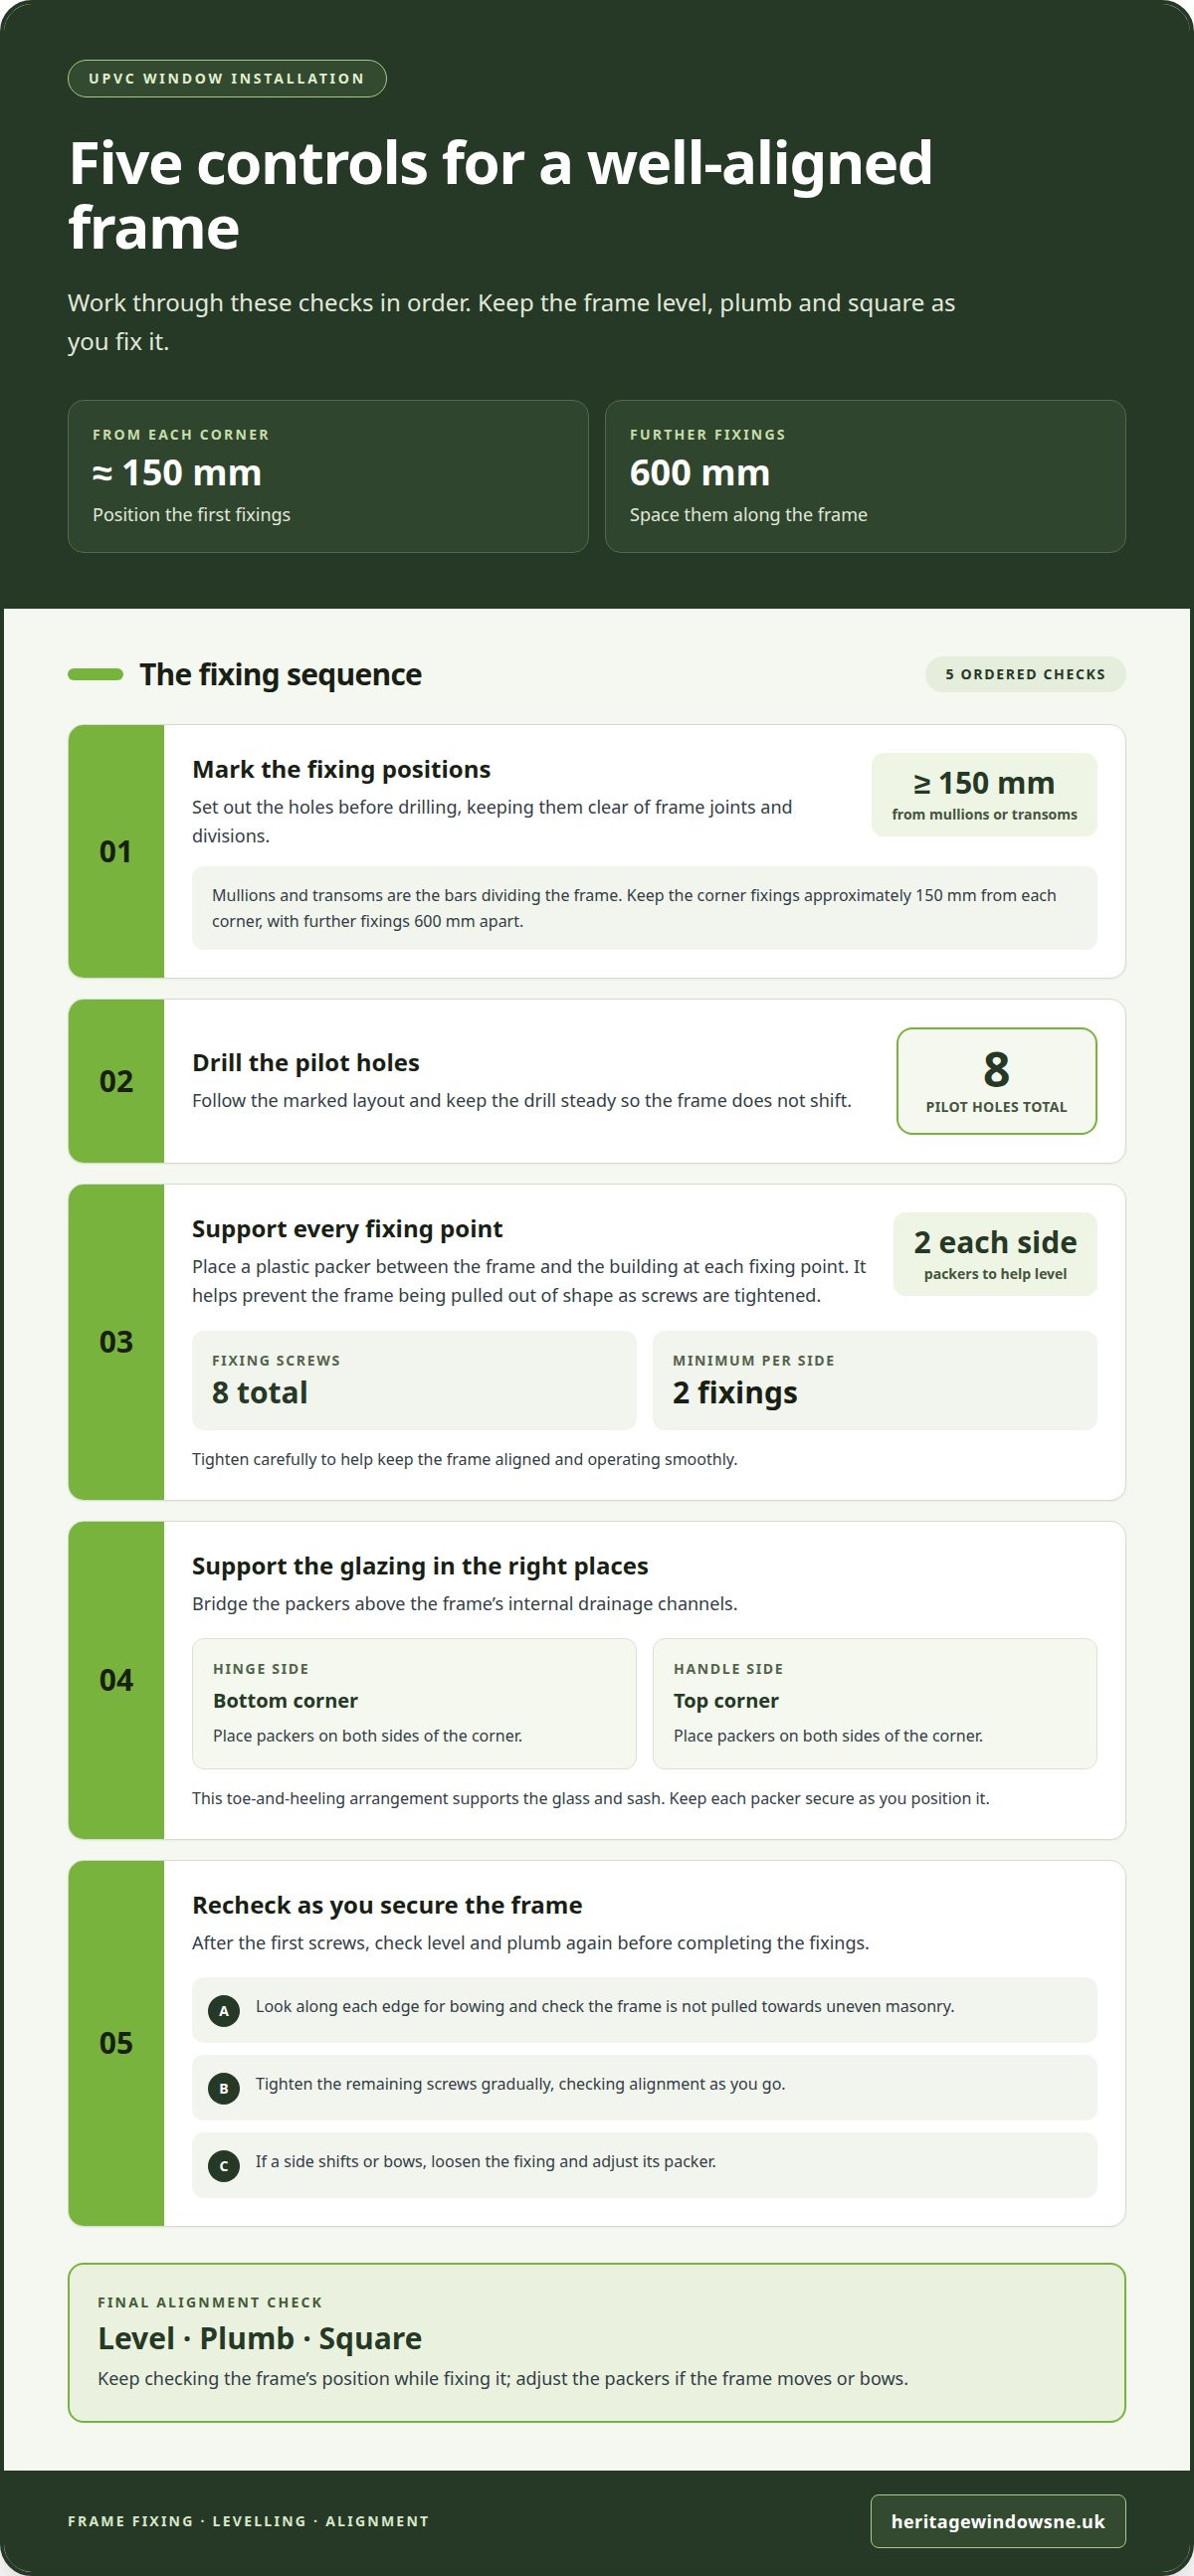
Mark fixing positions approximately 150 mm from each corner, then space further fixings at 600 mm intervals. Keep fixings at least 150 mm from any mullion or transom, the bars dividing the frame. Drill eight pilot holes in total for the fixing screws, following those positions. Keep the drill steady and avoid shifting the frame as you work. Check the layout first, so holes don’t land too close to a frame joint or its divisions.
-
Fit frame fixings and packers
Place a plastic packer between the frame and the building at every fixing point. These firm supports help prevent the frame being pulled out of shape as you tighten the screws. Use two packers on each side to help level the frame, adjusting them until the sides remain plumb and the top and bottom stay level. Fit eight fixing screws, with at least two fixings per side. Tighten the screws carefully to help keep the frame aligned and operating smoothly.
-
Support the glazing correctly
Position bridging packers so the glass sits above the frame’s internal drainage channels. For toe-and-heeling, place packers on both sides of the bottom corner on the hinge side, then on both sides of the top corner on the handle side. This supports the glass and sash in the right places. Keep each packer secure as you position it, so it does not slip away from the corner it supports.
-
Recheck alignment as you secure the frame
After fitting the first screws, check the frame’s level and plumb again before completing the fixings. Look along each edge for bowing, and make sure the frame is not pulled towards uneven masonry. Tighten the remaining screws gradually, checking alignment as you go. If a side shifts or bows, loosen the fixing and adjust its packer. Careful uPVC window installation keeps the frame aligned for the final operation checks.
Positioning, levelling and squaring the frame
Once the opening is ready, position the replacement frame without forcing it into place. Support the cill and check alignment before sealing or finishing.
-
Complete pre-installation checks
You can fit a window yourself if you can position, fix and seal it accurately. If you are unsure about these tasks, a professional installer can help address risks such as draughts, leaks, a bowed frame or a sash that catches. Make sure the installation plan covers measurement, alignment, sealing and handover paperwork.
-
Prepare and cap the uPVC sill
Fit an end cap at each end of the sill and secure it with a strong adhesive, such as super glue. The described end caps are roughly 4 inches long. Make sure each cap sits firmly, then support the sill fully beneath the frame so it remains properly seated against the opening.
- For replacement work, follow UK Building Regulations Part L and FENSA standards, according to the UK Government. Ventilation and escape arrangements also need consideration in the room’s design; their requirements depend on the opening and its use.
- FENSA or CERTASS certification is not automatically required for both routes. The installation process should make clear which compliance route applies and what paperwork you will receive at completion, such as the relevant installation or compliance record.
- A standard casement window typically takes 1–2 hours to install, depending on its size and site conditions. Poor positioning or sealing can leave draughts, water ingress or hardware that doesn’t operate smoothly. To discuss replacement options, explore uPVC window options.
Keep the cill fully supported underneath. Check that the frame sides are plumb and vertical, and that the top and bottom are level. Seal around the frame and glass carefully to help limit draughts and water ingress. The instructions also advise using silicone on the outside of the frame and acrylic on the inside.
After positioning the glass packers, test the window sashes to check that they open and close correctly. Clean uPVC frames with a mild solution of washing-up liquid and water, avoiding abrasive cleaners. Use proprietary glass cleaner for the glass.
Preparing and checking the window aperture
Prepare the opening and sill before bringing the replacement frame into position. Careful checks help you spot fitting issues early.
-
Complete pre-installation checks
Measure the opening’s height and width in two or three places, then use the smallest readings. The new frame should be at least 10 mm smaller than the opening, with a minimum clearance of 4 mm all round. Clear debris and loose material from the aperture. A frame forced against an uneven surface can sit poorly and leave gaps that affect the finished seal.
-
Prepare and cap the uPVC sill
Fit an end cap at each end of the sill and secure it with a strong adhesive, such as super glue. The end caps described are roughly 4 inches long. Check that each cap sits firmly and evenly, then ensure the sill has full support beneath it. This gives the frame a stable base as it is positioned.
- You can install windows yourself if you have the skills to measure, position, fix and seal them accurately. If you are unsure about those steps, a professional installer can handle the work. Ask about the measurement and fitting process, how operation is checked, and what completion paperwork you will receive.
- The guide says uPVC window installation should follow UK Building Regulations Part L, citing the UK Government. Ventilation and escape arrangements also need consideration for the room and opening. Make sure you know which compliance route applies and receive the relevant completion documents when the installation is finished.
- A standard casement window typically takes 1–2 hours to install, depending on its size and site conditions. Poorly fitted windows can have gaps, admit draughts or water, or leave a sash that catches. Check the opening’s measurements and condition before work begins, then make sure the frame can be positioned without force.
Checking operation and adjusting hardware
Test each sash after the glass packers are in place. Smooth movement, secure locking and clear drainage holes are useful signs that the window is operating properly.
- Open and close each sash fully, then repeat the movement slowly. Check that it does not catch against the frame, scrape the sill or leave an uneven gap. Test the handle and opener as well. If an opener does not work, remove it, repack it correctly and reinstall it before testing again.
- If a sash catches at the bottom, inspect the glass packers before adjusting the hardware. Adding packers in the top corner on the handle side pushes the sash upwards. Make a small adjustment, then open and close the sash again. It should move freely without rubbing or needing force.
- Close the window and test its lock. The handle should operate smoothly, and the sash should meet the frame evenly. If the lock feels stiff or the sash sits unevenly, check the opener’s packing and the sash position. Do not force the handle, as this can mask an alignment problem instead of resolving it.
- Inspect the drainage holes in the window base and clear away dirt or debris. Check them twice a year so water can drain through the frame after heavy rainfall. Water may briefly collect at the bottom before flowing out through these holes. Blocked drainage can prevent water from draining as intended.
- Keep moving parts clean, and spray WD40 into locks and onto metal-to-metal surfaces around windows twice a year. Avoid getting lubricant on glass or surrounding finishes. For a replacement window designed to operate smoothly, explore uPVC window options.
If the sash catches at the bottom, check its packing before changing the hardware settings. Glass packers in the top corner on the handle side push the sash upwards. After correcting the packing, test the sash again to assess the adjustment in operation, rather than assuming the hardware is at fault.
Include every window and door opener in the operational check, confirming that each works and is packed correctly. If an opener does not work, remove it, repack it and reinstall it before testing again. Check both the opener’s operation and packing, as well as the sash movement.
Heritage Windows NE: uPVC windows
Heritage Windows NE offers uPVC windows for homeowners planning a replacement and wanting help choosing an option for their home. The guidance above explains why accurate measurements, sound support and careful sealing matter; the right window choice is another part of planning the project. Heritage Windows NE also offers Composite doors, Bi-fold doors and French doors, if you’re considering other openings as well.
If you are considering replacement uPVC windows, contact Heritage Windows NE to discuss your requirements and request a free quote. Share what you want to replace and your preferences to start planning the next step.
Plan your next window project
Choosing a replacement window is also a chance to consider how the room should feel and function. Think about which openings you want to improve, how you use each space and what you want from the finished result. These decisions can help guide a practical conversation about your home and suitable window options.
Heritage Windows NE supplies and installs uPVC windows, as well as composite doors and bi-fold doors for different openings. Its team can discuss your requirements and help you consider a suitable window. If you are planning uPVC window installation in Sunderland or Newcastle, bring your priorities to the conversation, whether you are focused on appearance, operation or replacing an existing window.
Contact Heritage Windows NE to discuss your project and request a free quote. A clear starting point can make planning your home improvements feel more straightforward.
Frequently Asked Questions
How does correct installation improve energy efficiency?
Correct fitting helps the window close against its seals, reducing gaps where heat can escape and draughts can enter. Properly installed modern uPVC windows can reduce heat loss by up to 20% compared with old single-glazed units. In practice, the frame’s fit, functioning hardware and intact seals all matter: a sash that doesn’t close fully can undermine the window’s insulating performance.
What are the steps involved in installing uPVC windows?
The main stages are preparing the opening, positioning the frame, securing and supporting it, fitting the glazing, sealing and testing operation. In Sunderland and Newcastle, as elsewhere, each stage builds on the previous one: the frame must sit correctly before it is fixed, and the sash should be tested after glazing. Finish by checking that the handle and lock work smoothly and the window closes properly.
What UK building regulations apply to replacement windows, including ventilation and fire escape requirements?
Replacement work should follow UK Building Regulations Part L and FENSA standards. Ventilation and escape arrangements also need consideration based on the room and opening.
How do uPVC windows compare with aluminium and timber windows for cost, insulation and lifespan?
Properly installed modern uPVC windows can reduce heat loss by up to 20% compared with old single-glazed units.